
参考代码:
'''
# Copyright (c) [2025] [01Studio]. Licensed under the MIT License.
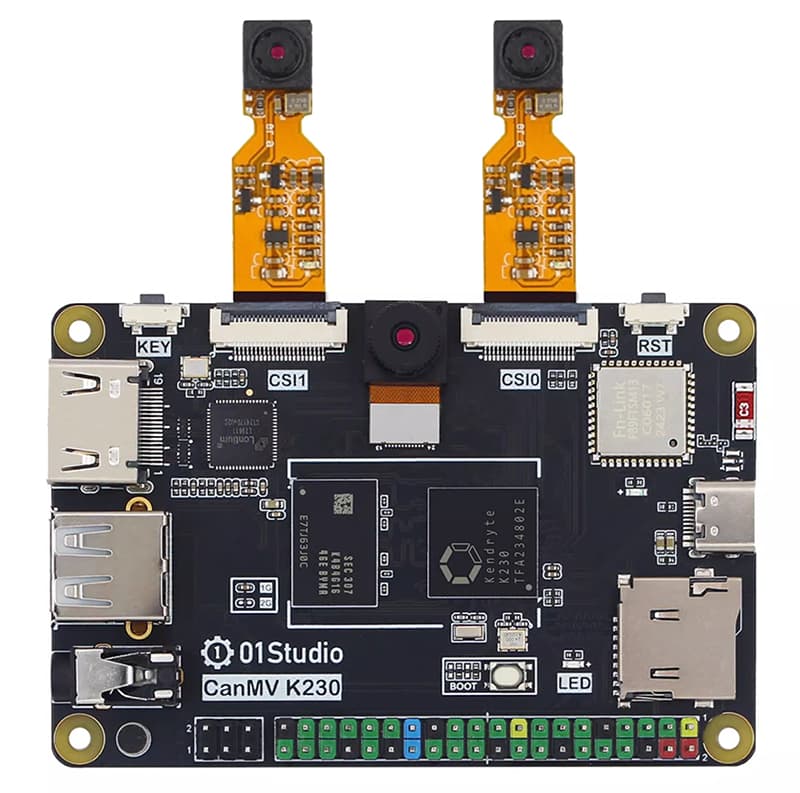
实验名称:3路摄像头同时采集图像
实验平台:01Studio CanMV K230
说明:实现摄像头图像采集显示
'''
import time, os, sys
from media.sensor import * #导入sensor模块,使用摄像头相关接口
from media.display import * #导入display模块,使用display相关接口
from media.media import * #导入media模块,使用meida相关接口
#默认摄像头GC2093
sensor2 = Sensor(id=2) #构建摄像头对象
sensor2.reset() #复位和初始化摄像头
sensor2.set_framesize(width = 960, height = 540) #设置帧大小
sensor2.set_pixformat(Sensor.RGB565) #设置输出图像格式,默认通道0
#CSI1接口
sensor1 = Sensor(id=1) #构建摄像头对象
sensor1.reset() #复位和初始化摄像头
sensor1.set_framesize(width = 960, height = 540) #设置帧大小
sensor1.set_pixformat(Sensor.YUV420SP) #设置输出图像格式
bind_info = sensor1.bind_info(x = 960, y = 0)
Display.bind_layer(**bind_info, layer = Display.LAYER_VIDEO1) #输出通道1
#CSI0接口
sensor0 = Sensor(id=0) #构建摄像头对象
sensor0.reset() #复位和初始化摄像头
sensor0.set_framesize(width = 960, height = 540) #设置帧大小FHD(1920x1080),默认通道0
sensor0.set_pixformat(Sensor.YUV420SP) #设置输出图像格式
bind_info = sensor0.bind_info(x = 0, y = 540)
Display.bind_layer(**bind_info, layer = Display.LAYER_VIDEO2) #输出通道2
#使用IDE缓冲区输出图像,显示尺寸和sensor配置一致。
Display.init(Display.LT9611, to_ide = True)
MediaManager.init() #初始化media资源管理器
sensor2.run() #启动sensor
sensor1.run() #启动sensor
sensor0.run() #启动sensor
clock = time.clock()
while True:
################
## 这里编写代码 ##
################
clock.tick()
img = sensor2.snapshot() #拍摄一张图
Display.show_image(img) #显示图片
print(clock.fps()) #打印FPS
相关资料:
1、01Studio多路摄像头硬件接线:摄像头 | 01Studio
2、层概念:https://developer.canaan-creative.com/k230_canmv/zh/main/en/api/mpp/K230_CanMV_Display_Module_API_Manual.html#bind-layer